Tag: Blog Design

5 Autumn-Inspired Watercolor Graphics I’m Loving Right Now (+ A Freebie!)

Autumn Watercolor Graphic Bundles

This post contains affiliate links. I only promote products I think are awesome + all opinions are 100% my own šŸ™‚

Have I ever told you how much IĀ loooveĀ design? And graphics? EspeciallyĀ handmade graphics???

I do. Like a lot.

Which is probably why I really enjoy the formatting part of writing a blog post and I LOVE playing around in the Customizer page. And in case you don’t know, IĀ obsessĀ over color combinations.

One thing I really like about autumn is how everything seems to be dying but there are still sooo many interesting bursts of colors and it’s just, it’s plain amazing. (Of course I haven’t experienced autumn firsthand because I’m a girl from the tropics haha)

I’ve been practicing making my own watercolor graphics (and I just like scrolling for pretty graphics and illustrations, ok??)Ā And while I was scouring the Interwebs for inspiration, I found some really cool autumn-inspired watercolor graphic bundles.Ā They’re all gorgeous and I love how they made use of the orange + purple color combo because I really like that color combo <3

AND! AND! I have a freebie made by yours truly at the end so don’t miss that out! šŸ˜‰

Autumn Watercolor Graphic Bundles

Note: The following images are not mine and I don’t claim them as mine.

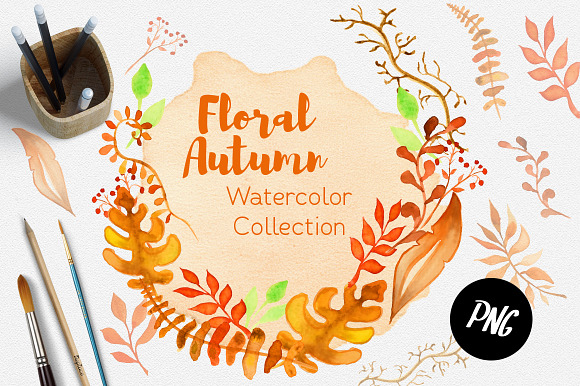
Fall Watercolor Clipart Autumn

This one makes use mostly of oranges and reds. But what’s interesting to me are the curvy-ness of the branches and leaves, I found that really helps in making wreaths easily.

Fall Watercolor clipart Autumn - Illustrations

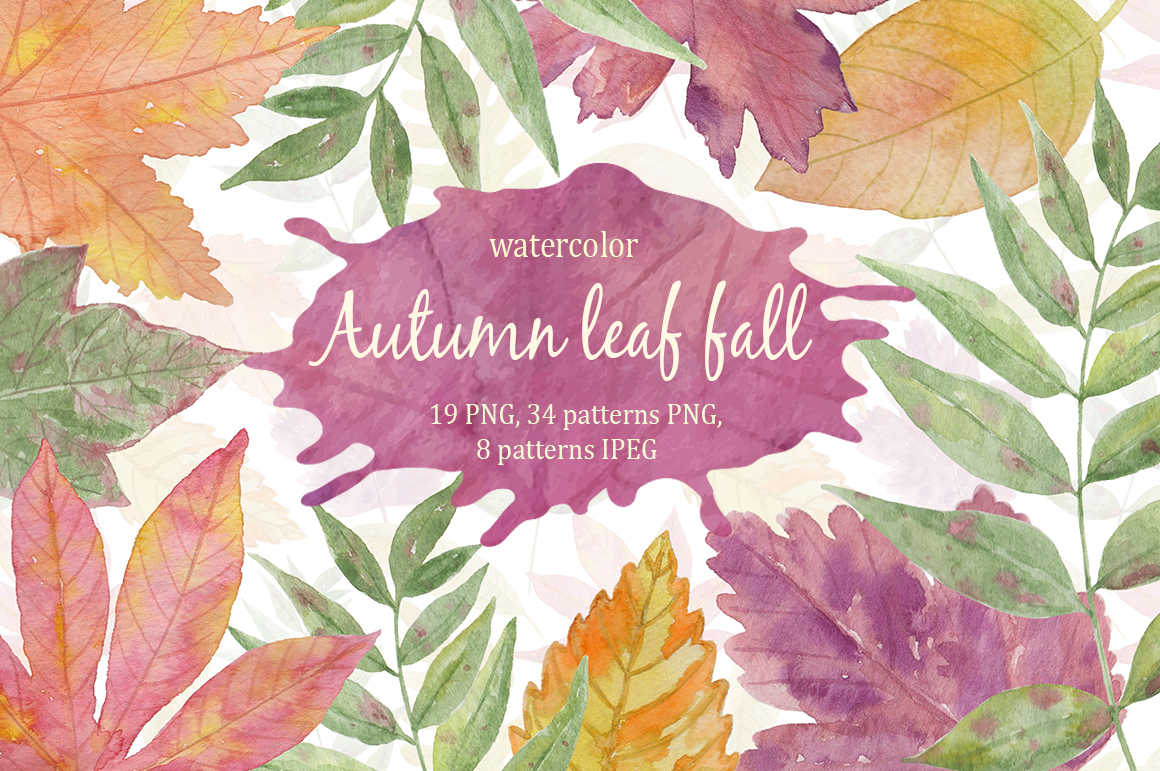
Autumn Leaf Fall Watercolor

Ugh. This one’s pretty. I LOVE the muted shades but somehow there’s still vibrancy. I also like how she used a different color to line the leaves (And is that digital?)

I kiiinda tried that with color pencil in mine and it didn’t work hehe

Watercolor Wonderful Leaves

Ohmigosh ohmigosh. This one’s PRETTY. This is also #goals for me. I love how delicate those leaves look and also how she used more purple shades than oranges.

Watercolor wonderful leaves. Autumn example image 1

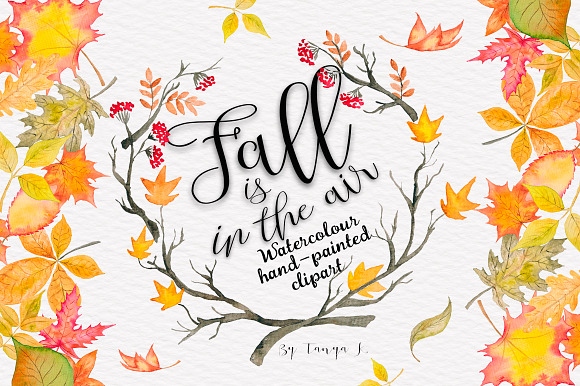
Fall Is In The Air

Okay, this one’s kinda similar to the first one in color scheme, except she also added in a little bit browns ans greens and yellows which makes them less monochromatic in a way. Looking at these really reminded me of a ground fully covered of dried leaves that I often see in Instagram.

Fall is in the air Autumn Watercolor - Illustrations

Autumn Forest

This is the same artist who made the purple leaves above and gahhh I’m such a fan of her now. I’ll probably look her up on Instagram after writing this hahaha

I love that dark and muted shade of green she used in some of her individual leaves and I tried making leaves in that color too. They’re really good to pair with oranges and reds.

Autumn forest | Watercolor | Fall example image


OverĀ the past few months, Iā€™ve been working on creating watercolor paintings that I wanted to turn into graphic elements.

Iā€™ve been really interested with the concept ever since two years ago, when I discovered Freepik and other glorious spectabulous websites that offer handmade drawings as digital elements. In my eyes, tHEYā€™RE THE FREAKIN RAINBOW UNICORN OF THE DESIGN WORLD.

Iā€™m such a nerd, I know hehe

Anyway, I did say that I was gonna practice on painting plants and other pretty graphic-worthy thingies from now on. And I did! Eep!

Now hereā€™s the thing. I actually made 39 individual elements.

But for some reason, they have white jagged outline around each element even if I made them transparent. I only learned how to fix the white thingy last week so Iā€™ll slooowly fix each elements and wonā€™t be able to share them with yā€™all.

Until then, here are 5 watercolor graphic elements I made for fun using some of the individual elements šŸ˜€

Free Autumn Watercolor Floral Graphics

These are already transparent and in .PNG format. They’re great on white background or any other light colored background. To download, simply click the image above and it should download directly! šŸ™‚

And I guess thatā€™s it for now! Iā€™ll see you all again next Saturday!

YOUR TURN: How are you? <3 Do you have any creative projects youā€™re currently doing? Would you mind sharing? šŸ˜‰

Ooh! Also guys: Iā€™m thinking of making either textured patterns or tribal-inspired watercolor graphics next. Which one would you like to see?

TwitterĀ |Ā PinterestĀ |Ā InstagramĀ |Ā Bloglovin

ā€‹Choosing the Right Color Palette for Your Blog

Have you ever looked at your blog’s free theme and thought of the other dozens of people using it who all have basically the same look as yours? Maybe you want your blog to look at least a wee bit different than others?

Yo I did, too. And I like how mine looks now. Though, there are still some things I’m currently improving.

“But how can you do it on a free platform, Kate?” I hear you ask.

Well really, it has a lot to do with being creative and resourceful, which I love to do so hey! In the next couple of Saturdays, I’ll be sharing the things I did. And we’ll start with your blog’s color palette!

Before that, though, I have to tell you that these are tiny changes you can do to give your blog that “you” feeling. There aren’t any crazy CSS customization or coding here since it’s not available in WordPress’s free platform.

Now! Color palettes.

color-palette-for-blog

How do you know if it’s The Right One? From my experience (and it isn’t much, mind you) it’s somewhere between something you like and something that will tell your readers what exactly your blog is about.

I’ll explain that further below. For now, here are three actionable steps you can take to choose a color palette for your blog.

1 | Get to Know Your Theme

The free themes in WordPress usually have two or three available color palettes that you can choose from. And I can bet ya my favorite watercolor brush they are neutral or versatile colors, colors you can pair up with different other colors.

I mean, I should know. I’ve probably used 5 different themes in the span of two years. #Guilty

The thing is, most blogs I see only use the default colors and then have their own header images. Not that there’s anything wrong with that, mind you. But for me, a custom header isn’t enough.

And if you’re like me, then heed this advice: Get to know your theme.

Learn the specs and features available in your theme. Go to Appearance>Customize in your Dashboard and head over to Colors and Backgrounds. There, you’ll see the different color palettes you can use. Tweak them.

2 | Think of Your Blog’s Ambiance

You know how when you enter a cafe with lots of dark and earthy tones, you get this grounded feeling like you could settle there and be reassured? Or maybe you entered a gift shop with lots of light shades and pastel hues. It has this cheerful and happy atmosphere, right?

That, my friends, is the power of color.

(*whispers excitedly* Amazing, right? Riiiiight?)

You can use color psychology to create a certain atmosphere you want your blog to have just like a physical shop. Do you want your blog to feel friendly and light-hearted? Maybe your sassy personality oozes out of your blog?

Here’s an example of pink along with earthy colors giving an ohmigosh-it’s-so-beautiful! combination of femininity and stability. Gorsh, Pantone should hire me XD (from Design Seeds; image via @closetteblog)

Also, consider your blog’s voice. This is the “personality” that comes out of the words you write. Take a good look at how you write your posts and take note of the kind of voice that it has. Does it sound sarcastic? Adorably awkward? Kind and positive?

You could even reach out to a friend or family and ask them to read a couple of your posts. This way, your blog’s colors will align to your blog’s voice.

3 | Use Color Palette Resources

There are sooo many ways and resources available for you to create your own color palette but I’ll mention the three I used:

Adobe Color CC

I freakin love this app! You can use it on a mobile device or a computer. And, the best part, it’s free! You can enter a certain color and the app will show you the different color palettes you can create based on different color rules (analogous, complementary, etc.) or a custom color palette if you wanna DIY.

Adobe Color Wheel

You can also upload a picture and the app will pick the different colors from the photo. And you can change the color mood!

Bless Adobe!

Adobe Color Mood

Mood Board

You can also look for pictures that invoke those feelings you want your blog to have.

Enter mood board.

Last Wednesday, we talked about how mood boards can help in inspiration-needed times and hey! Here’s one! You can head on to the post to know how to create a mood board and I even have 3 free .psd templates you can use šŸ˜‰

I used a mood board when I was looking for other colors I can maybe add into my palette. Because, you know, creative blog = colorful-ish. But I don’t plan on using them all the time; they’re just minor colors.

Design Seeds

I’ve heard about this site for so long but I’ve only visited the site last October and oh my gosh! If you love colors, I’m sure you’ll love this site. Its tagline is literally “For all who love color”! There are tons of color palettes based on spectacular photographs in Design Seeds and you will leave the site feeling super inspired šŸ˜€

Design Seeds Site

The Blog Market has also posted other color palette tools and resources that you can use. Check out their post and their blog! I am such a huge fan of it!

4 | Keep What You Like in Mind

In the previous three steps, I’ve given you tips on choosing a color palette with your readers in mind. I’ve read it plenty of times from different bloggers that a successful blog caters not only to the blogger but most especially to its readers. And this is true most of the time.

With your readers in mind, you can create a color palette that:

+ Creates the atmosphere you want your blog to have

+ Successfully let people know what your blog is all about (e.g., a fun and open blog with lots of good vibes and inspiration, in my blog’s case)

But this doesn’t mean you won’t put what you like into consideration. Remember that this is your space in the vast Interwebs. For one thing, it would be more fun to create posts in a space you actually like to see them in. And at the same time, it would feel more “you”, doesn’t it? Which is why we started this post in the first place.

To make your humble virtual space more yours. šŸ™‚

If you reached the end of this reeaaally long post, thank you so much for reading! šŸ˜€ How did you come up with the color palette for your blog? Is there a certain topic you like me to discuss regarding blog improvements? Tell me your thoughts!

Happy blogging, awesome peeps! 🎨

How to Easily Create Watercolor Graphics with Photoshop

Hey, funky bunch! What are you guys doing? šŸ˜€

(Iā€™m giving a cookie to anyone who gets the reference)

Lame greetings aside, Iā€™ve recently been experimenting with Photoshop. You probably noticed the change of quality of the graphics recently. Or probably not.

Donā€™t get me wrong, I freaking love Phonto. But the difference in image quality you get from editing with Photoshop is huge. So I decided to enhance the watercolor graphics you see in the sidebar over there >>>

Handmade graphics can be a pretty addition in your overall blog design. As this is a creative blog, I feel like they add to what this blog is all about.

Also, I just love watercolors so much.

watercolor

I plan on using my own made-from-scratch graphics on all aspects of my blog someday. But for now, since the Free Plan has limited customization features, these graphics made in 7 easy steps will do.

So letā€™s get to it, yeah?

Step 1: Open the image you want to edit

This could be anything handdrawn, not just watercolors. You can either scan it or take a picture. If you do go with the latter, you want to make sure your camera has a good enough quality. I used an 8 MP phone camera for this one and manipulated with the sharpness, the brightness and the color using a combination of Snapseed, VSCO and MS Paint. And it looked alright. If you want a tutorial for this one, let me know. šŸ™‚

1-open-brush-image

Step 2: Unlock background

I find itā€™s better that the handdrawn graphics have a transparent background. That way, you wonā€™t have to worry about how unclean it will look in your blogā€™s background. But thatā€™s me talking about my own preferences.

So you simply double-click the Background layer in the Layer Panel and this will pop out.

2-unlock-background

Then click OK. Youā€™ll see that the Background changed into a Layer 0.

Step 3: Add a new layer

I think this is what makes the editing of the graphics as neat and sharp as it could be. You just want to click thatā€¦dog-eared paper? And a new layer, default name Layer 1, will pop above Layer 0.

3a-add-new-layer

This will be your temporary background until youā€™ll have a transparent one and it will help you see that your handdrawn image is neatly edited. Next, drag that new layer down so it will be below Layer 0.

3b-drag-new-layer-below-background

Step 4: Fill the background

Now still selecting Layer 1, click on the Paint Bucket Tool on the left or click G. Make sure that your current color is in contrast with whatever color your handdrawn image is. You can see that I used a pink that contrasts well with the blue watercolor brush stroke. After that, click on any part of the image.

4-background-filled

You wouldnā€™t see any changes in the image itself but youā€™ll notice in the Layers Panel that the rectangle beside Layer 0 has changed to color pink.

Step 5: Erase the white background

Now I want you to select on Layer 0 so that only the items in that layer (the image itself) will be affected by whatever change you do. Click the drop down arrow beside the Eraser Tool and click on Magic Eraser Tool.

5-magic-eraser

This is kinda like the opposite of the Paint Bucket Tool. Once you do that, youā€™ll be able to see the pink underneath.

Step 6: Polish

At this point, you just need to use the Eraser Tool (not the Magic one) to polish the edges. I wanted a faded effect around the edges so I increased the size of the eraser and simply grazed the circle cursor over the edges. For that neat stroke-y look on the right end, I decreased the size so it will only erase the part in between and also decreased the opacity.

6-fully-erased

And voila! A neat watercolor brush stroke graphics! But are you done?

Step 7: Delete Layer 1

Of course not yet! I did say 7 easy steps earlier. Hereā€™s the last one. Right click on Layer 1 and click on Delete Layer. Youā€™ll see the image now has tat checkered background which indicates that your background is transparent.

7-delete-added-layer

And voila foā€™ reals! Youā€™re done!

I hope this helped you a bit. Let me know if you want to see any specific tutorials and Iā€™ll see what I can do to help. šŸ™‚ But until then,

Happy editing, awesome peeps! 💻

8 Places that Offer SUPER-GORGEOUS Stock Photos for Free


One of my long-term goals here in my blog is to hopefully provide my own quality photographs to use here in my blog. Which means buying a good quality camera (not necessarily DSLR, for starters) and learning basic blog photography.

But until then, I need to rely on stock photos.

When I was younger and Internet-innocent, I had a generalizationĀ for stock photos. I always thought they’re… Generic. Meh. People in white background wearing fake ready smiles and obviously staged/choreographed poses.

So I scoured the Interwebs. Visited plenty of blogs with information on the best providers for free stock photos. Consulted the huge Library of Google as I embarked on my three-book journey to find the One True RingĀ the horde of gorgeous stock photos that IĀ can download and use for free. I don’t require much just:

+ Something with white as a dominant color or not
+ Colorful
+ Perky/Quirky
+ No parts of the human bodies (e.g. fingers typing on a laptop)

I just want you all to know that this isn’t The Ultimate List So Thou Shan’t Read Any Other. These are just the sites that worked for me and have photos that ticks all the boxes for what I need in photos for my blog. So let’s start the party, yeah?

8 Places to Get Free GORGEOUS Stock Photos | I share 8 places where you can get free stock photos that are super gorgeous. Blogging Advice - Blog Graphics

Pixabay Totally free. No attribution needed. My First Love. Most of the stock photos I used in this blog are from Pixabay. It’s easy to navigate and there’s a search bar so it’s a WIN. Other than my favorite desk photos, I found really funky photos here like this one.music owl

Magdeleine Check photo for attribution. Magdeleine has some kind of theme. Their photos have that deep and mellow feel to them. They’re usually in muted shades so if that’s the kind of vibe you’re aiming for your blog then by all means. Personally, I like how they use white a lot from what I’ve seen. And I feel like I could use their photos in Monday Motivation posts or something similar.Magdeleine | Where to Get Gorgeous Free Stock Photos

GratisographyĀ Totally free. No attribution needed but owner would not refuse if you buy him coffee. Where Magdeleine’s are mellow, Gratisography’s photos are cheery and bright. Lots of whimsical photos too.Gratisography | Where to Get Free Gorgeous Stock Photos

Life of PixĀ Totally free. Use for personal or commercial use. No attribution needed.Ā You know, if this site was an Instagram account, I would click that follow button like there’s no tomorrow. I love how spacious the photos are, I love the angles and…gosh, did I say anything about the huge spaces? Honestly, the style is what I hope to achieve in my own Instagram account.Life of Pix | Where to Get Gorgeous Free Stock Photos

Foodies FeedĀ Totally free. No attribution needed. Oh my Clark Gable, this site always makes my stomach grumble whenever I visit it! I haven’t used or downloaded anything from this site but I’ve seen great potentials and I’ve learned thatĀ food will always find a way into your life. So… I’m not closing this possibility. (Teehee)Foodies Feed | Where to Get Gorgeous Free Stock Photos

Creative ConvexĀ For non-commercial use only.Ā Need email sign up. Creative Convex is made by the same maker of PinkPot, Chaitra,Ā and she sells styled photos here. However she offers free photo packs for her subscribers. She also doesn’t mind being mentioned in Instagram or linking to her site.

WonderlassĀ Use however you want but she’d be happy to be credited or linked back to her blog. Need email sign up. Wonderlass is one of the most successful blog in the blogosphere. Alison, the beauty and brain behind this blog, has a thing for bright colors and pretty office supplies. So if that’s what you’re going for in your blog, then give hers a try! She also gives free stock photos for her subscribers.

Say Hello PhotosĀ Use however you want but don’t distribute the free photos yourself. Need email sign up. I discovered this one through Creative Market (where ooh! you could also find a free stock photo bundle every week). These photos are specifically for lifestyle bloggers but, you know, they’re gorgeous and anyone who wants to use them can use ’em. RhondaĀ sends photo bundles every month to her subscribers. I got the one for fall this September and *squeals* I’m so excited to use them.

And there you go! These are the places I go to whenever I need some gorgeous free stock photos. Some additional tips that you may want to take note of before enjoying your free stock photo haul:

ā€¢ Always look at the license or terms and conditions.

ā€¢ For consistency, stick to photos with similar styles. For example, I always look for photos that has most or all of what I require, as seen above.

ā€¢ Go do your thing! I’m not forcing you to sign up for anything. I wouldn’t sign up my email just for the free stock photos or any freebies but also because I genuinely like their blog’s content. I’m all about inbox space-savers yo.

YOUR TURN: Do you use stock photos? If so, did I mention any site where you get stock photos? Don’t be shy to share!

Happy blogging, awesome peeps! 💃

Where Do You Find Free Graphics or Fonts? | The Monthly Catalog

Happy August, everyone! How was your first week of the month? I hope good.

Now I don’t know what you plan to do for your August (you can share them below, of course!) but I also plan on helping you as much as I can. Remember my monthly catalog? Well…TADA!

Here’s the first ever monthly catalog in my blog which I consider calling KATE-alog! Genius, right? No? Okay…let’s move on.

The Monthly Catalog banner

So I hear you asking, what is the monthly catalog?

The Monthly Catalog is going to be a monthly feature here in my blog. Basically, I will scour the Internet to find and share to you a list of resources that I think may help you guys. So let’s get to it!

For the first ever Monthly Catalog (or KATE-alog! Still no? Okay.) I have come up with an amazing topic to make a list of (which you all know from the title): Where to find free graphics or fonts.

Before I was still ignorant of online copyrights and I have this notion that everything you see in the Internet is free. Now, I’m a nervous wreck when using graphics that aren’t mine. You just never know when the Internet police will knock on your door with a warrant, you know?

where to find free graphics and fonts

Back when I was starting the Blog Revamp project, I was really thinking about my blog’s aesthetics. I know I need to come up with my own blog graphics, one way or another. However, I was facing some problems.

+ I’m no graphic expert who can conjure pretty graphics from scratch.

+ I can’t afford a graphic designer to do it for me.

+ Microsoft cliparts and Comic Sans are not even options but…

+ Being the jobless student-on-vacation that I currently am, I can’t afford the pretty fonts some shops have for sale.

Or don’t I?

If you canā€™t afford the premium themes and glitteringly sophisticated graphics, worry not. I found a solution for me that I hope may be a solution for you too! So let me be clear: these aren’t The Ultimate Resources out there but these are what worked for me in the past couple of months that I’ve been using them.

Here are some websites I found that offer free graphics or fonts:

Behance. The creativesā€™ hub in the Internet. I usually use Behance for inspiration and free fonts. But they also have great graphics there. Type in ā€˜freeā€™ in the search bar et voila!

Freepik. When it comes to graphic websites that offer freebies, this one is my first love. Itā€™s my go-to for watercolor illustrations because they have fabulous ones and all for free! Those social icons on the right are downloaded from Freepik.

Design Cuts. I love how this site has ā€œFreebiesā€ as one of their main item in the navigation bar. And their freebies could go free for a very long time, which is great. Because I can’t download anything more than 20 MB with my crappy data connection. So I’m hoping to splurge-download when I go back to school.

Font Bundles. Oh my Clark Gable, this site is THE ULTIMATE FONT HEAVEN! Ahem. Pardon my sudden fangirling for fonts. Anyway, they have new free fonts every week. And just last week, they started giving away two free fonts every Wednesday too! And theyā€™re nothing like the Chiller fonts, believe me.

Creative Market. I saw a lot of amazing deals in this site but that doesnā€™t change my uber-frugal mode at the moment since Iā€™m still a jobless student. So I have to settle for freebies and they do have new ones every week. And the freebies are always fab. Who am I kidding, everything in the Creative Market are fab!

Creative Booster. Like the previous three mentioned above, this site usually sells graphics or fonts but I see the site as a Freebies Lounge. I discovered Design Cuts and Font Bundles because of Creative Booster.

So those are the sitesĀ I get free graphics and fonts that I use in my blog. One additional tip: Look at the licenses and terms of the freebies. Usually they are good for personal use, which is what Iā€™m doing. But if you plan on using the freebies for commercial use, you really do want to look at the license and terms.

And remember: MS Clipart and Chiller are fun and all but donā€™t let them be your only options. There is a humongous amount of resources out there and some of them are free.

I really do hope this first Monthly Catalog (orā€”alright, alright. Iā€™ll drop it already) was helpful to you guys.

Happy blogging, awesome peeps! 💃

Kate signature