Tag: Watercolor

drawing my ravenclaw outfit – watercolor timelapse

Picture of a watercolor painting of a brunette with shoulder-length hair wearing a big glasses and blue sweather with multi-colored fuzzy balls. A hand holding a water brush pen with pink paint is in the process of coloring in a fuzzy ball. This is a self-portrait.

hello folks!

I’ve been MIA this March, partly because it’s my birth month (ya gal is an older 20-something now!) but mostly because I’ve not really felt the urge to write anything. I do have some blog post ideas on my notes app but none that compel me enough to have a sit down and write my thoughts.

I have been more active over on Instagram (@keetnoodles). I just finished my second month-long art project on March which I might talk about more on here in the future.

In the meantime, here’s a watercolor process video I posted months ago. I joined in an art challenge hosted by an art friend I met over on insta. Enjoy!

Purple Hair Girl – Watercolor Portrait Timelapse

Hello! The past few weeks, I’ve been working more on my art so expect this space to be a bit quieter for a while. I’m still thinking about scheduling posts on here and the type of stuff I want to discuss often. I have some ideas that I hopefully will be able to work on, now that I’ve quit my job.

(more…)

Pink + Flowers – a mixed media timelapse painting

watercolor mixed media portrait of a girl with pink hair and holding flowers

One of the things I am most afraid of (quite irrationally too, if we’re being honest) is filming myself and sharing it to the world.

(more…)

5 Autumn-Inspired Watercolor Graphics I’m Loving Right Now (+ A Freebie!)

Autumn Watercolor Graphic Bundles

This post contains affiliate links. I only promote products I think are awesome + all opinions are 100% my own šŸ™‚

Have I ever told you how much IĀ loooveĀ design? And graphics? EspeciallyĀ handmade graphics???

I do. Like a lot.

Which is probably why I really enjoy the formatting part of writing a blog post and I LOVE playing around in the Customizer page. And in case you don’t know, IĀ obsessĀ over color combinations.

One thing I really like about autumn is how everything seems to be dying but there are still sooo many interesting bursts of colors and it’s just, it’s plain amazing. (Of course I haven’t experienced autumn firsthand because I’m a girl from the tropics haha)

I’ve been practicing making my own watercolor graphics (and I just like scrolling for pretty graphics and illustrations, ok??)Ā And while I was scouring the Interwebs for inspiration, I found some really cool autumn-inspired watercolor graphic bundles.Ā They’re all gorgeous and I love how they made use of the orange + purple color combo because I really like that color combo <3

AND! AND! I have a freebie made by yours truly at the end so don’t miss that out! šŸ˜‰

Autumn Watercolor Graphic Bundles

Note: The following images are not mine and I don’t claim them as mine.

Fall Watercolor Clipart Autumn

This one makes use mostly of oranges and reds. But what’s interesting to me are the curvy-ness of the branches and leaves, I found that really helps in making wreaths easily.

Fall Watercolor clipart Autumn - Illustrations

Autumn Leaf Fall Watercolor

Ugh. This one’s pretty. I LOVE the muted shades but somehow there’s still vibrancy. I also like how she used a different color to line the leaves (And is that digital?)

I kiiinda tried that with color pencil in mine and it didn’t work hehe

Watercolor Wonderful Leaves

Ohmigosh ohmigosh. This one’s PRETTY. This is also #goals for me. I love how delicate those leaves look and also how she used more purple shades than oranges.

Watercolor wonderful leaves. Autumn example image 1

Fall Is In The Air

Okay, this one’s kinda similar to the first one in color scheme, except she also added in a little bit browns ans greens and yellows which makes them less monochromatic in a way. Looking at these really reminded me of a ground fully covered of dried leaves that I often see in Instagram.

Fall is in the air Autumn Watercolor - Illustrations

Autumn Forest

This is the same artist who made the purple leaves above and gahhh I’m such a fan of her now. I’ll probably look her up on Instagram after writing this hahaha

I love that dark and muted shade of green she used in some of her individual leaves and I tried making leaves in that color too. They’re really good to pair with oranges and reds.

Autumn forest | Watercolor | Fall example image


OverĀ the past few months, Iā€™ve been working on creating watercolor paintings that I wanted to turn into graphic elements.

Iā€™ve been really interested with the concept ever since two years ago, when I discovered Freepik and other glorious spectabulous websites that offer handmade drawings as digital elements. In my eyes, tHEYā€™RE THE FREAKIN RAINBOW UNICORN OF THE DESIGN WORLD.

Iā€™m such a nerd, I know hehe

Anyway, I did say that I was gonna practice on painting plants and other pretty graphic-worthy thingies from now on. And I did! Eep!

Now hereā€™s the thing. I actually made 39 individual elements.

But for some reason, they have white jagged outline around each element even if I made them transparent. I only learned how to fix the white thingy last week so Iā€™ll slooowly fix each elements and wonā€™t be able to share them with yā€™all.

Until then, here are 5 watercolor graphic elements I made for fun using some of the individual elements šŸ˜€

Free Autumn Watercolor Floral Graphics

These are already transparent and in .PNG format. They’re great on white background or any other light colored background. To download, simply click the image above and it should download directly! šŸ™‚

And I guess thatā€™s it for now! Iā€™ll see you all again next Saturday!

YOUR TURN: How are you? <3 Do you have any creative projects youā€™re currently doing? Would you mind sharing? šŸ˜‰

Ooh! Also guys: Iā€™m thinking of making either textured patterns or tribal-inspired watercolor graphics next. Which one would you like to see?

TwitterĀ |Ā PinterestĀ |Ā InstagramĀ |Ā Bloglovin

Attempting More Details and Backgrounds

Hereā€™s a fact about me regarding my watercolor paintings and drawings in general: I donā€™t usually have backgrounds. If you skim through all my artsy creations here in my blog, youā€™ll notice that I usually just draw a character and forego any specific background.

Lineart has always been my favorite part of making an artwork so I always have full concentration on that. Then I would breeze through the coloring or shading. I end up having a not-so detailed work and back then, I find that good enough.

Now skimming through different artists on Instagram and Youtube, I see how much work they put into the background and the little details in the piece.

It amazed me.

The result was this piece of work thatā€™s moreā€¦complete, I guess. The characters arenā€™t just characters in white background. They have a story and a personality. Thereā€™s a certain mood that you wonā€™t only see in the characterā€™s expression but also backed up by the background and props.

And I decided, ā€œI want that in my work.ā€

But deciding to change the way you create things is far easier than the act itself.

It was hard, extremely hard to add more into my ā€œdrawing routine.ā€ And so I did it little by little this month.

Remember when I had that Poker-faced Girls Series of watercolor art? Well, I made another series but this time itā€™s four girls embodying the four natural elementsā€”fire, earth, water, and air. Itā€™s called Elemental Girls with Closed Eyes Series.

This is where I decided to put in a little more effort in tiny details. Each girl took up around a day to finish but thatā€™s because I didnā€™t work with the next girl straightaway.

Water (I didnā€™t have time to think of their names, sorry) has this wavy-ish hair and the hem of her dress looks like sea foam. I had fun doing the seaweeds but omg, those bubbles feel so awkward. Or is it just me?water girl watercolor

Having Fireā€™s hair look like, well, fire was extremely fun, especially doing that gradient-like feel. Her seemingly burnt dress was an accident I made but a happy accident nonetheless.

fire girl watercolor

Air has no defining feature, honestly. You wonā€™t be able to tell sheā€™s Air without those clouds. But I like how dreamy she looks like, snuggled up in the clouds. Gosh, I want to be her.

air girl watercolor

Earth was the last elemental girl I drew and I loved her a lot. I honestly donā€™t know how I successfully made those cracks in the ground but they look so legit and Iā€™m happy with it. šŸ™‚

earth girl watercolor

Here are other works I made this November:

I painted the lineart I made last month and I was immediately in love with it. I made a short backstory about the five of them which you can see in my Instagram art account. (Psst! Itā€™s a new account, give some lovinā€™ and Iā€™ll spread it ;))

group watercolor and ink

My friend gave me this purple gel fountain pen-ish (I honestly donā€™t know what itā€™s called but the label has fountain pen so //shrugs) and I tried it out. I noted how the ink bleeds incredibly fast so I have to line a certain area real fast if I donā€™t want it to bleed.

violet-girl

I recently bought my first ever gouache tube set and Iā€™m in love with how vivid the colors are! <3 I immediately tested it out along with my brush pen because I havenā€™t used that in a while. I learned that the brush pen bleeds with the gouache more easily than with watercolors as you can see with the Blue-haired girl. That was my first attempt.

blue-haired-girl

Donā€™t ask me what sheā€™s looking at, even I donā€™t know.

This was my second attempt and I like how the gouache could be light and also used for details like the shadows of the hair.

ponytail-girl

This was my third attempt and I screwed up with the skin color but now when I look at her, it looks pretty with the light purple hair.

violet-hair-girl

This was my fourth attempt. At this point, I used watercolor for her skin and put in gouache with the rest and then lined it with the brush pen after. Meaning, I completely changed my drawing process. And it looked neater.

blonde-ribboned-girl

And thatā€™s it! These are what I created this month. Do you have any favorites? šŸ˜‰ Would you recommend something I would draw? Shoot me an email or comment it below!

Happy creating, awesome peeps!

How to Easily Create Watercolor Graphics with Photoshop

Hey, funky bunch! What are you guys doing? šŸ˜€

(Iā€™m giving a cookie to anyone who gets the reference)

Lame greetings aside, Iā€™ve recently been experimenting with Photoshop. You probably noticed the change of quality of the graphics recently. Or probably not.

Donā€™t get me wrong, I freaking love Phonto. But the difference in image quality you get from editing with Photoshop is huge. So I decided to enhance the watercolor graphics you see in the sidebar over there >>>

Handmade graphics can be a pretty addition in your overall blog design. As this is a creative blog, I feel like they add to what this blog is all about.

Also, I just love watercolors so much.

watercolor

I plan on using my own made-from-scratch graphics on all aspects of my blog someday. But for now, since the Free Plan has limited customization features, these graphics made in 7 easy steps will do.

So letā€™s get to it, yeah?

Step 1: Open the image you want to edit

This could be anything handdrawn, not just watercolors. You can either scan it or take a picture. If you do go with the latter, you want to make sure your camera has a good enough quality. I used an 8 MP phone camera for this one and manipulated with the sharpness, the brightness and the color using a combination of Snapseed, VSCO and MS Paint. And it looked alright. If you want a tutorial for this one, let me know. šŸ™‚

1-open-brush-image

Step 2: Unlock background

I find itā€™s better that the handdrawn graphics have a transparent background. That way, you wonā€™t have to worry about how unclean it will look in your blogā€™s background. But thatā€™s me talking about my own preferences.

So you simply double-click the Background layer in the Layer Panel and this will pop out.

2-unlock-background

Then click OK. Youā€™ll see that the Background changed into a Layer 0.

Step 3: Add a new layer

I think this is what makes the editing of the graphics as neat and sharp as it could be. You just want to click thatā€¦dog-eared paper? And a new layer, default name Layer 1, will pop above Layer 0.

3a-add-new-layer

This will be your temporary background until youā€™ll have a transparent one and it will help you see that your handdrawn image is neatly edited. Next, drag that new layer down so it will be below Layer 0.

3b-drag-new-layer-below-background

Step 4: Fill the background

Now still selecting Layer 1, click on the Paint Bucket Tool on the left or click G. Make sure that your current color is in contrast with whatever color your handdrawn image is. You can see that I used a pink that contrasts well with the blue watercolor brush stroke. After that, click on any part of the image.

4-background-filled

You wouldnā€™t see any changes in the image itself but youā€™ll notice in the Layers Panel that the rectangle beside Layer 0 has changed to color pink.

Step 5: Erase the white background

Now I want you to select on Layer 0 so that only the items in that layer (the image itself) will be affected by whatever change you do. Click the drop down arrow beside the Eraser Tool and click on Magic Eraser Tool.

5-magic-eraser

This is kinda like the opposite of the Paint Bucket Tool. Once you do that, youā€™ll be able to see the pink underneath.

Step 6: Polish

At this point, you just need to use the Eraser Tool (not the Magic one) to polish the edges. I wanted a faded effect around the edges so I increased the size of the eraser and simply grazed the circle cursor over the edges. For that neat stroke-y look on the right end, I decreased the size so it will only erase the part in between and also decreased the opacity.

6-fully-erased

And voila! A neat watercolor brush stroke graphics! But are you done?

Step 7: Delete Layer 1

Of course not yet! I did say 7 easy steps earlier. Hereā€™s the last one. Right click on Layer 1 and click on Delete Layer. Youā€™ll see the image now has tat checkered background which indicates that your background is transparent.

7-delete-added-layer

And voila foā€™ reals! Youā€™re done!

I hope this helped you a bit. Let me know if you want to see any specific tutorials and Iā€™ll see what I can do to help. šŸ™‚ But until then,

Happy editing, awesome peeps! 💻

Create with Me: Watercolor Flower Garden

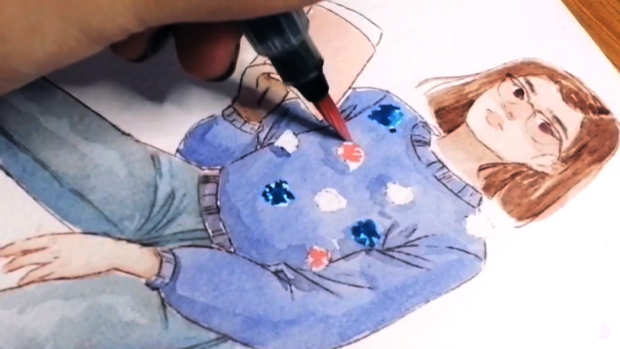
Hey guys! This is going to be a new feature here in the blog and you can expect it during Saturdays–although, not every Saturday. It’s kinda like Paint with Me or Get Ready with Me for lifestyle bloggers but since I plan on getting crafty every now and then, I thought “Create” will cover the broad scope of creative experiments and projects that I’ll have in the future.

Please note that these aren’t tutorials. Although I may have tutorials in the future, Create with Me will basically be a glimpse on what happens in the learning curve part of… well, whatever I’m learning. In this case, watercoloring.

I’ve also added some lessons I’ve learned during the whole experience including one lesson that I think can be applied to life in general. Because life lessons from mundane activities are awesome, no?

One thing you can expect: Lots of messes, mistakes and disasters. But that’s okay! As they say, every expert was once a beginner. And I seriously believe that the path of learning comes with lots of messes and mistakes and cussing. šŸ˜‰

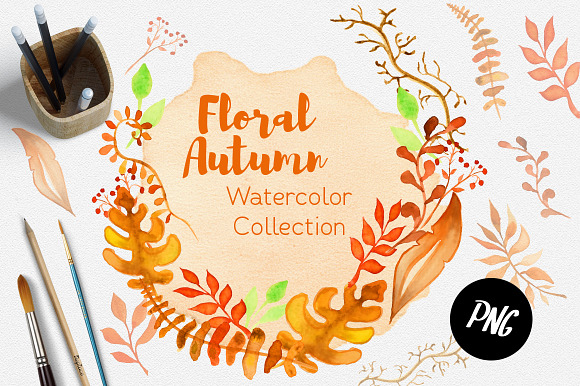
So let’s get to it! Today, I will show you how I made this kinda cute watercolor flower garden. Watercolor Flower Garden

I love adding flower gardens in my sketchpads because they’re so pretty. But I’ve only ever tried one finished watercolor flower garden and…it was too messy for my taste. This one was my second attempt and it was a tad bit better.

The first thing I did was pick my color palette. I got two shades of green, one dark and one lighter, for the leaves and stems. I tried different colors for different stems the first time and that didn’t sit well with me. It looked messy. But if that’s what you like, go ahead and try it! I have three kinds of flowers in three different colors too.

Lesson #1: Always check if your brush was washed before dipping it in your palette. I forgot mine still had dried green watercolor from when I last used it and my golden yellow turned into this greenish color that looked like the color of mucus. Sigh. Had to add more yellow into it afterwards.

Gosh, I haven’t even started putting brush on paper, and I’m already messing things up. 😩

Okay, after recovering from that mucus disaster, I started painting the ferns and other leaves on the bottom part.

Lesson #2: There’s nothing wrong with rotating your paper if you want to. I mean, it’s far better than twisting your wrist. Less painful too, believe me. Unless of course you’re also improving your flexibility. šŸ˜‰

Then I painted the flowers. At this point, I was winging it. Since this isn’t a realistic drawing but something quirky and informal in style, I wasn’t really focusing on perfect flowers. I added buds for each flower too.

imperfect-flowers-watercolor-flower-garden

buds-watercolor-flower-garden

And to show how noob I still am at watercoloring, when I got to painting the orange flower that was supposed to be this cute kind with more than five petals, this happened.

lefty-struggles-watercolor-flower-garden

Oh no!

Lesson #3: Mind your hands and make sure they don’t touch a still-wet part.

Lesson #3.5: If it does, cussing is okay.

Lesson #4: But don’t give up on your work instantly. (As a perfectionist, this is a hard lesson to learn.) If you can still save it, try to.recovering-from-hand-disaster-watercolor-flower-garden

After that disaster, I was so into painting the rest of the flower heads that I forgot taking pictures of the process. But this is how it looked afterwards.flower-heads-watercolor-flower-garden

I, then, added the leaves and stems.

adding-stems-and-leaves-watercolor-flower-garden

Lesson #5: There are very few straightedges in the natural world. So don’t fret too much if your lines are crooked. šŸ™‚

Also: did you know that the scientific term for when a plant’s stem stretches to reach enough sunlight is called etoliation? Fun fact, yo.

I added some finishing touches and it’s done!

Finished lookI had so much fun making this, despite the many disasters (disaster #2 happend more than twice) that happened. I was also playing some music while working and it was quiet so it was kind of like a therapy.

Here’s the life lesson I learned: In life, we often encounter mess-ups and things not going according to plan. And we automatically give up. I know I did countless times. I almost did in this artwork.

But maybe, you can still save something. Maybe a little change in the plan can be good. See if you can do something else before you completely give up on whatever it is you’re working. Who knows, maybe that little change could make a positive impact bigger than you would expect. šŸ˜‰

If you did something crafty or creative recently, let me know in the comments below and add some lessons you’ve made while doing it. I would love to hear about it! šŸ™‚

Happy painting, awesome peeps! 🎨